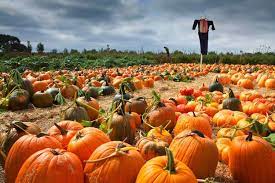
Fall is here with pumpkin spice lattes, tractor rides, corn mazes, leaves to rake, and much more. To participate in this momentous time of the year, there are many exciting activities that are fun for the whole family and one that all can partake in is the growing of a pumpkin patch right in the comfort of your home. Patches take 90-120 days to grow with about a year of preparation. Trust the process provided below in order to grow perfect pumpkins.
Get ready for this process is by planning this patch one year out from your intended date of start (typically a good time to plant is May), and finding an area with plenty of space. Start by creating specific mounds of dirt for however many pumpkins you would like to grow. These mounds help for the pumpkins to grow in with plenty of drainage. To create these mounds, make a hole about a foot by a foot, and place horse manure about a few inches deep. After the manure is placed in the bottom of the hole, add all of the soil back on top of the manure hole to make a small mound. This preparation phase is key to a strong and healthy pumpkin patch in the folloing Fall as this process leads to a better draining patch as well as perfect soil for the following season when the patch will start to plow (Gardener’s Path).
There are two different ways of acquiring seeds which can be from an existing pumpkin, make sure to dry the existing seeds on paper towel, or you can buy seeds from packets and plant them after purchasing the seeds. When the season rolls around, plant the seeds roughly an inch deep into your mounds that you have prepared and make sure to water your patch with a total of roughly 20 gallons per week, which is easy to administer part of the amount daily. Once your pumpkins get to about 12 inches tall, start to fertilize them with Espoma Garden-tone Herb and Vegetable Food. Make sure to not step on the roots while they are growing as they are fragile during their growing phase.
To prevent the pumpkins from being eaten, a wire fence found at a home improvement store is definetly worth investing in to build to keep out deer and other big animals that want a snack. Once your pumpkins have grown to a nice and orange color with plenty of shape and size to them, use a kitchen knife or garden shears to cut roughly 6-8 inches above the pumpkin where the stem meets the pumpkin’s top. Once your pumpkins have been cut, there are many things you can do with your new patch! Some popular and easy options can be making pumpkin pie, selling these pumpkins, carving them, or even taking the seeds and starting another patch! The possibilities are endless and now with your own patch in hand, what will you do?


